DIY Agility & Training Equipment
Our own Agility Park
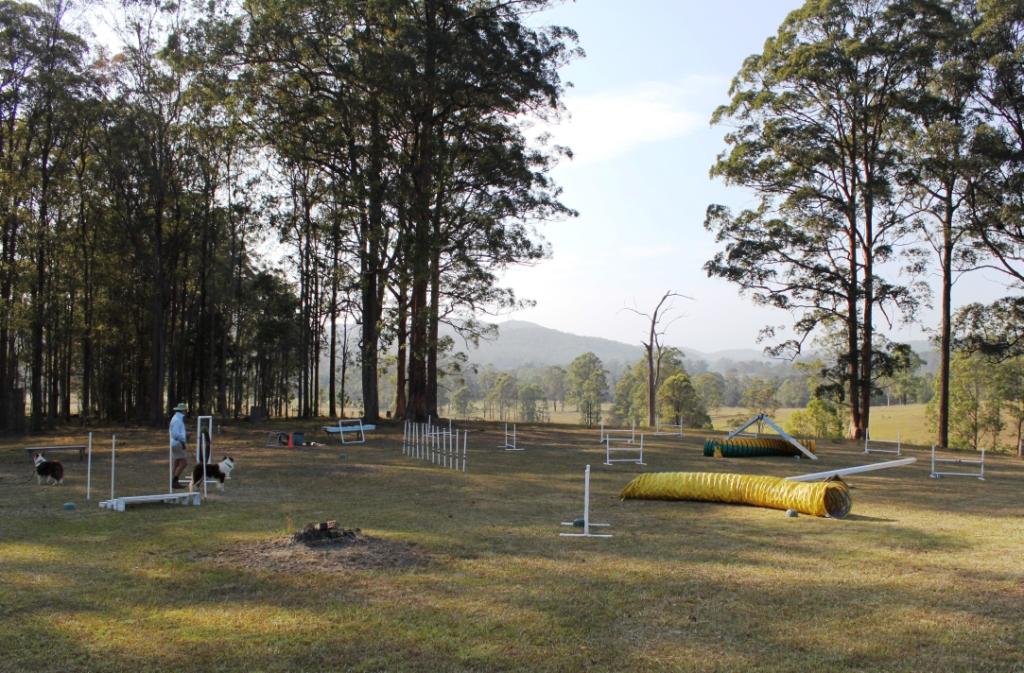
We have made all our own equipment for our Agility Park except for the tunnels. The best & most expensive tunnel we purchased was through the ADAA website. It was expensive but well worth the money compared to a much cheaper one that we bought from a mine ducting company, called Plasticoat in Victoria.
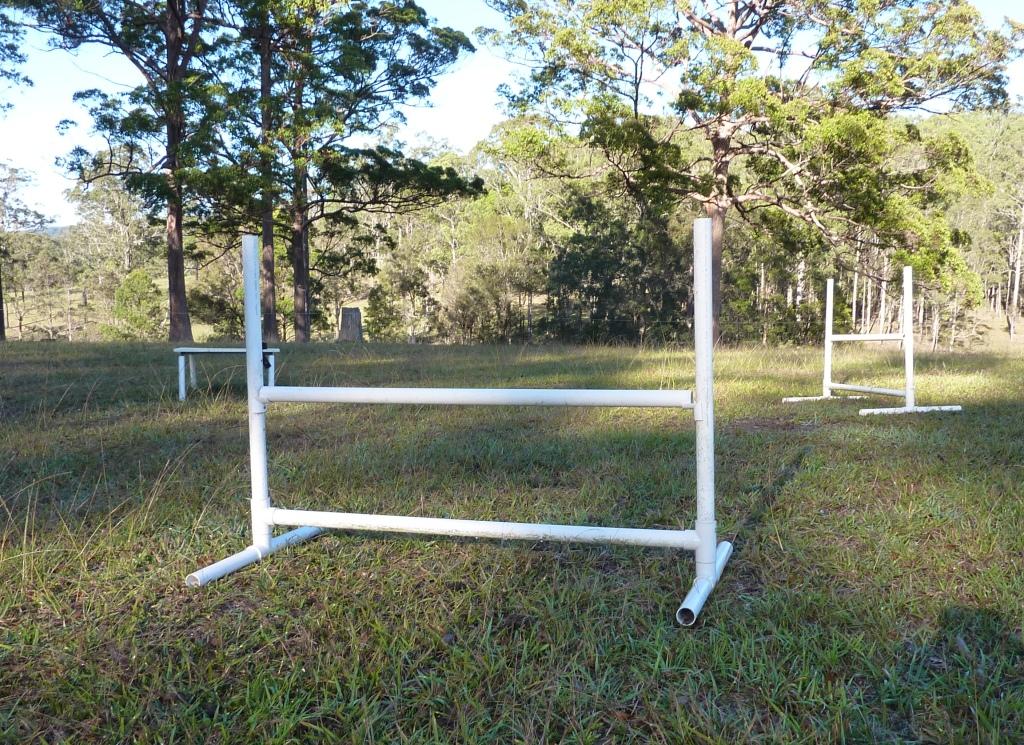
The jumps are all made from poly pipe & joiners. The A-Frame, dog walk & see saw are all made from easily obtained materials from places like Bunnings. The see saw converts to a low dog walk & the A-Frame lowers right down, almost flat, for training purposes. In the background, you can see a square made from poly pipe, which is used for training running contacts on the A-Frame. The numbers are painted on squat flower pots.
The ANKC specifications for the equipment can be found on this link ANKC Rules
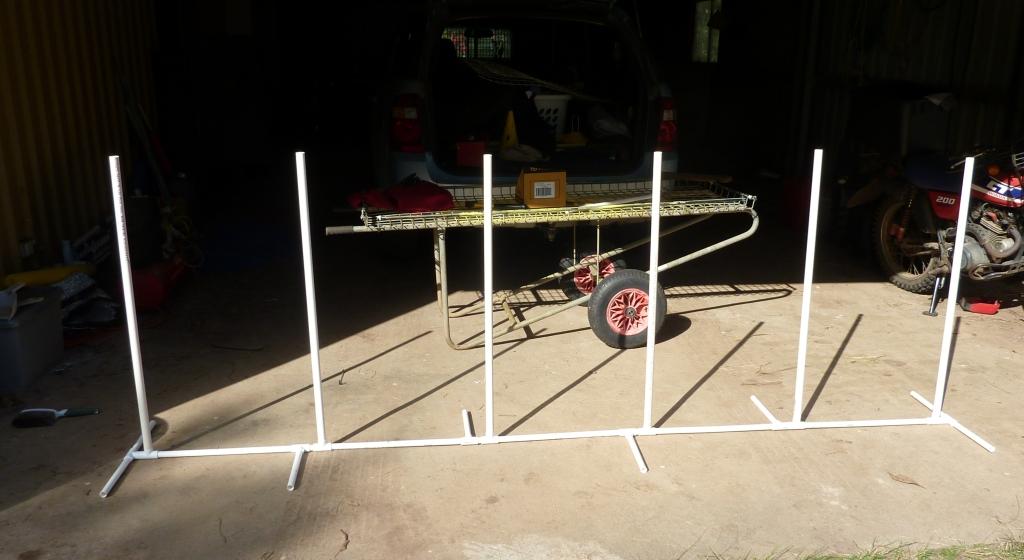
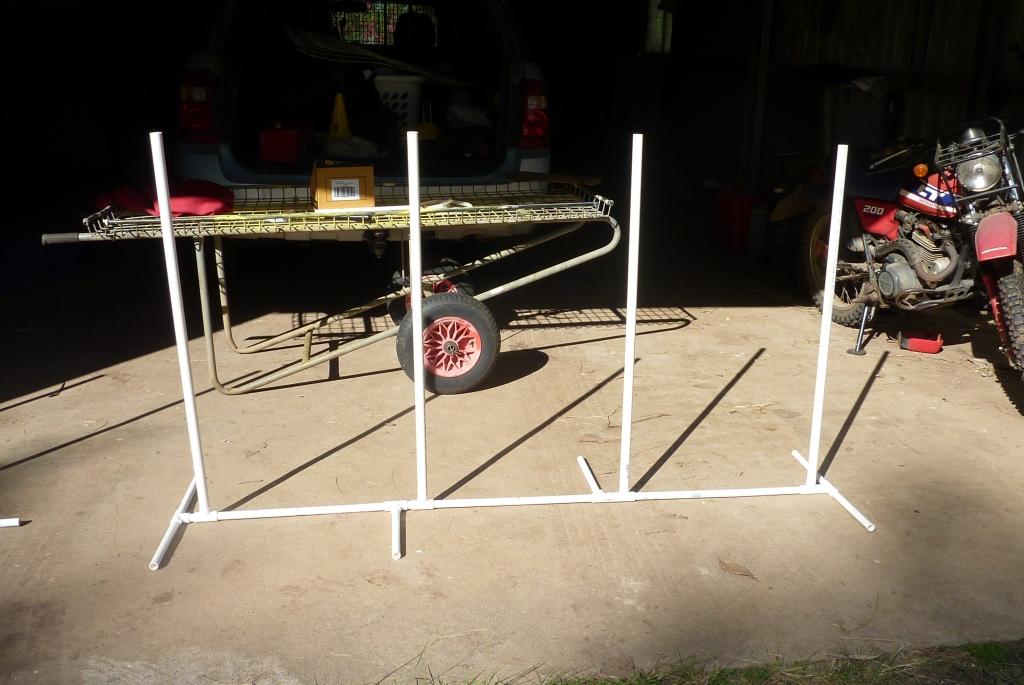
Quick, Easy, Cheap & Portable Weave Poles & Jumps
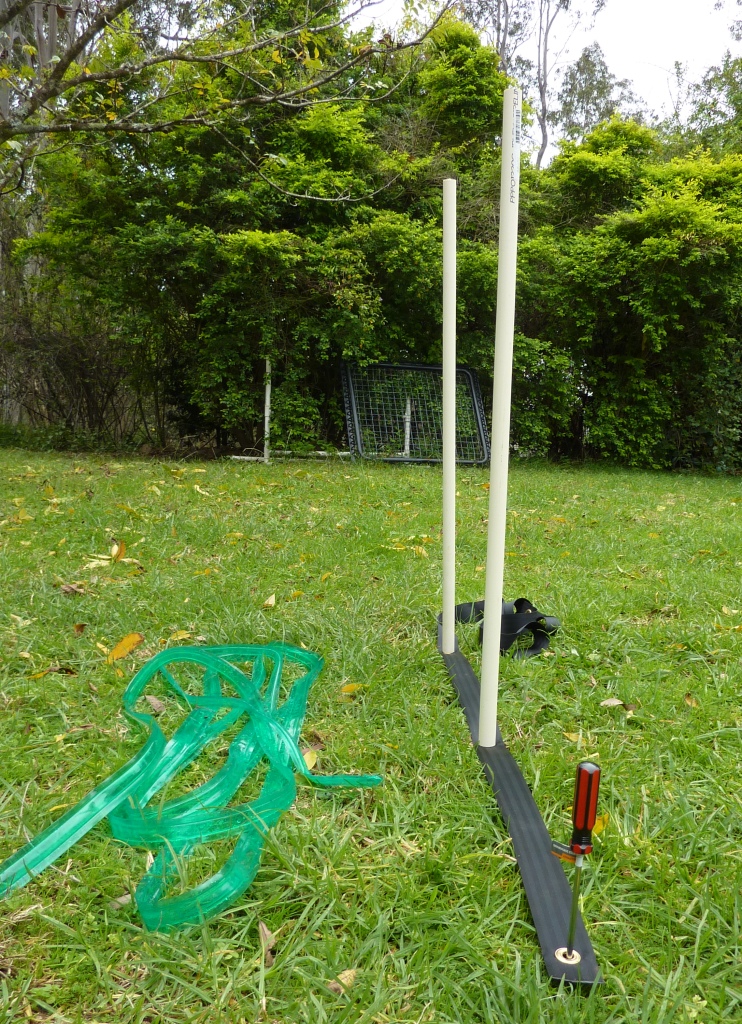
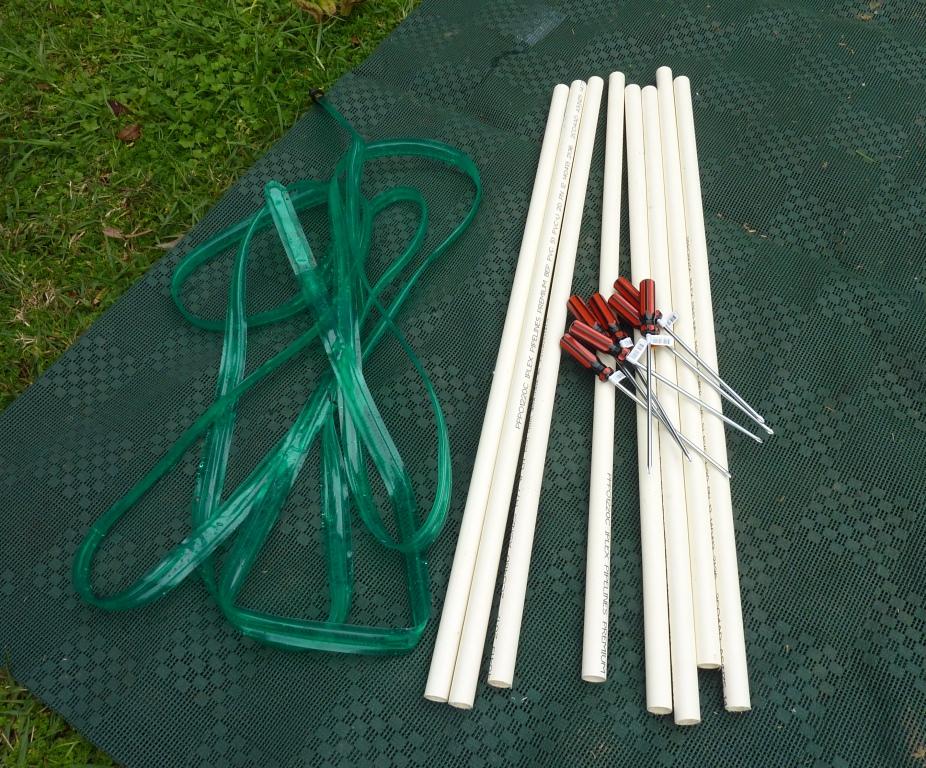
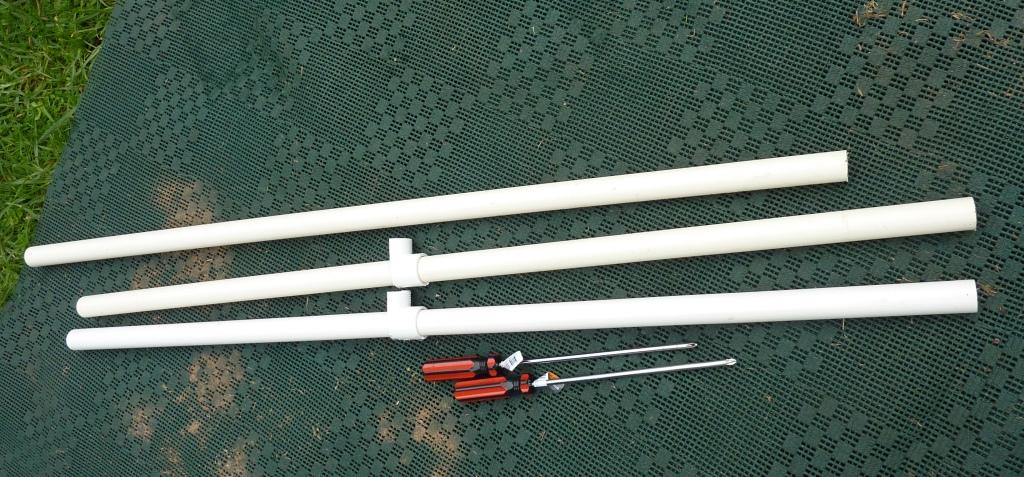
You need 12 long screwdrivers, (I used 28cm
from Bunnings @ $2.50 each), 12 lengths of
poly pipe size to fit (I used 4 x 3 metre
lengths @ approx. $4.00 per length),
& a cheap soaker hose, marked off at 60cm intervals
Total cost less than $50
In the picture opposite I have used a length of seat-belt webbing & eyelets, but I wouldn't bother with the eyelets again as they rust out.
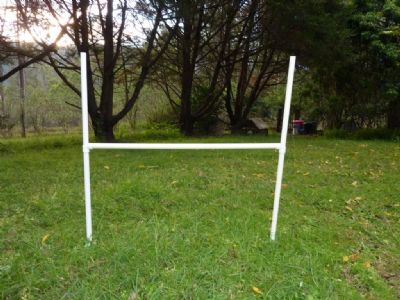
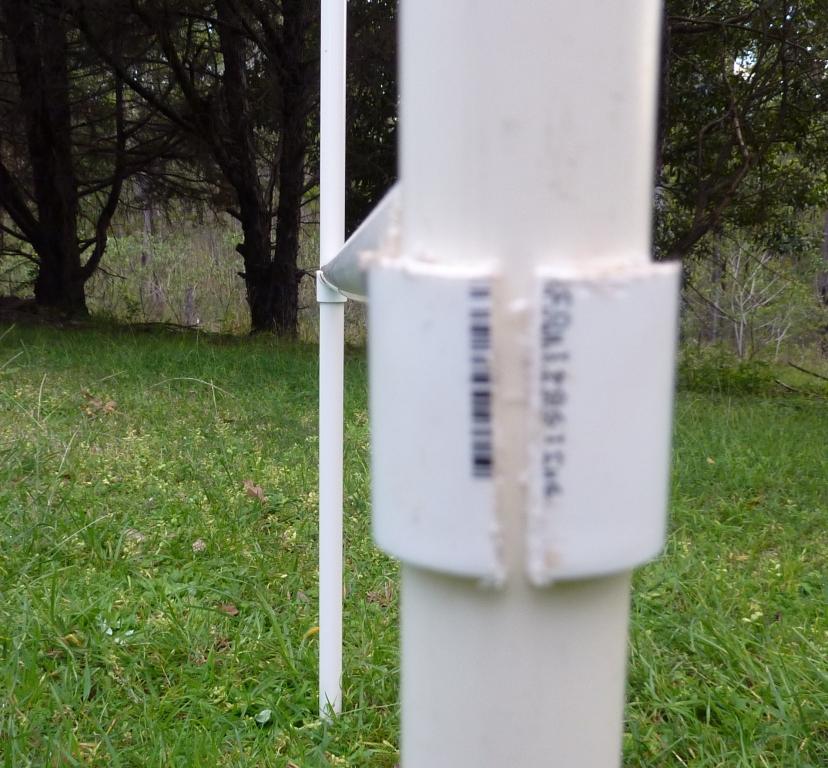
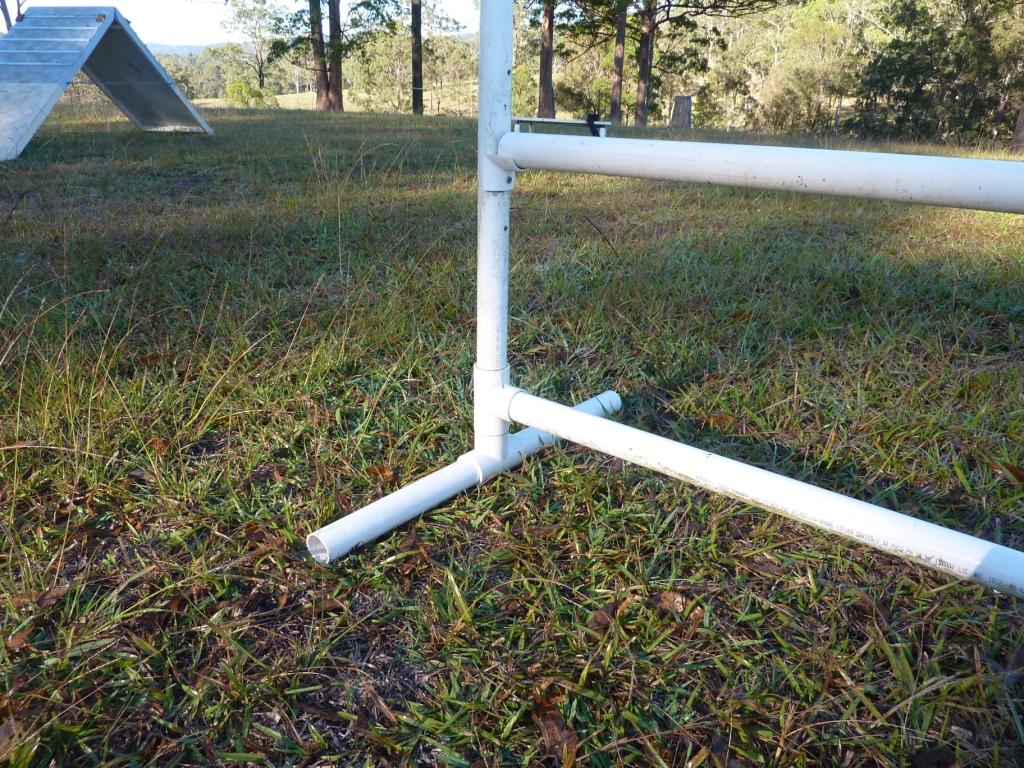
I have used the same equipment as the weave poles to make simple jumps. They don't look it, but they really are quite sturdy. If you want a wider jump, just use a longer piece of pipe. The only extra thing you need here is one T joint to match the size of the pipe. Cut it in half, as shown, & cut down the back, so that it slips over the pipe more easily. This makes the jump cups which slide up & down for different heights.
Total cost, less than $10 per jump.

Winged Jump
Two more one metre lengths of pipe, two elbows, two T Joiners, (both to fit the pipe), two more 28cm screwdrivers, a bit of plastic garden mesh & some cable ties & we have a winged jump. I have cut the T joiners down the back to allow them to slide onto the pipe more easily.
NB.. to avoid cutting off your fingers when cutting the poly pipe & fittings, secure them
first in a vice.
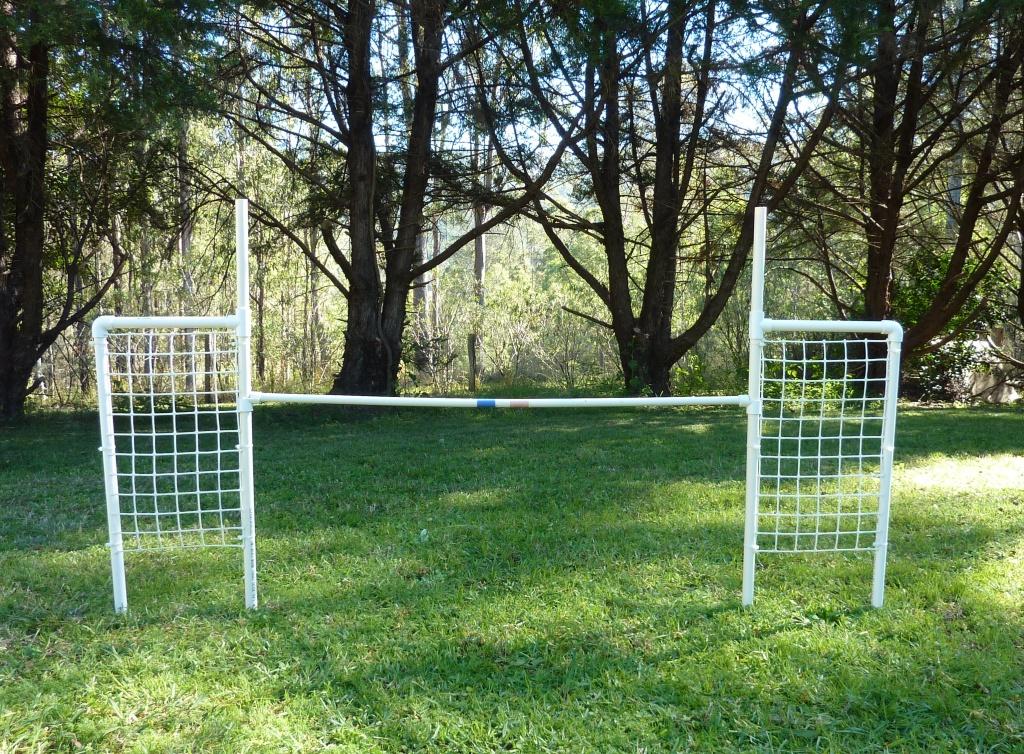
You could use these wings with any jump...just fix them to the ground with the two screwdrivers.
For each jump you will need 2 x 3 metre lengths of poly pipe & 5 x "T" joiners to suit. Cut up as follows -
2 x 120cm for the cross bars, 2 x 75cm for the uprights & 4 x 30cm for the feet. One of the joiners is used to make the jump cups as above. The two joiners at each side of the base are joined together with a small length of pipe. You can glue it all together using plumbers poly glue or just bang them firmly into place using a rubber mallet. Total cost depends on what size pipe you use.
They can also be neatened up by adding caps to the pipes, but this adds to the cost.
MAKING WEAVE POLES WITH BASES FROM POLY PIPE
The first set I made were a set of six, but for the ease of transportation, I then converted them to a set of four & will add two more separate sets of four. Or you could make 2 x 2’s. Total cost for a 6 pole base approximately $35. Allow extra if you don’t already have the uprights. You may already have these from where you made the portable “stick in the ground” poles with poly pipe & screwdrivers.
For instructions click on this PDF File Making Weave Poles With Bases
DIY Foundation Training Equipment

This equipment would normally be trained by shaping, using a clicker & treats
Rear: A flat board approx one metre long & 30cm wide, painted with a non slip surface using a mixture of sand & paint. This board is used for training the puppy contact obstacles & is laid flat on the ground or raised up slightly at one end. It is useful for early training of the "2on 2 off" position, where the dog stops at the end of the contact obstacle with his front feet on the ground & his back feet still on the obstacle. He remains in this position till given the release word. By putting a piece of poly pipe underneath it is an early introduction to the see saw.
Middle: A round piece of board with a door knob screwed to the centre. It is shown here up-side-down, & is commonly called a wobble board. This simple piece of equipment trains the puppy to be comfortable on uneven & moving surfaces.
Sides: Two safety cones purchased from Bunnings. These are used to teach direction, distance, go-rounds and wraps. It is handy to have two so that you can stand in the middle & direct your pup to do figure 8's, gradually increasing the distance.
Front: A home-made box approx 30cm X 30cm & 8cm high is used to teach your pup, rear-end awareness. The pup is shaped to stand with his front paws on the box, with you standing on the opposite side. He is then shaped to move his rear-end around as you move to remain in the opposite position to you. The pup is also shaped to place his back two feet on the box so that he is in the 2on 2off position & remains there while you toss treats around him. He only gets to have those treats that he can reach without moving his foot position. He is rewarded by you picking up a treat & giving it to him or releasing him to the treat. If he moves to get the treat before being released make it a non-event by quickly covering the treat with your foot. This exercise would normally be taught & proofed on the floor first, before moving it onto the box.
Front: Tug toys, & missing from the picture, the all important clicker & treats used for shaping the behaviours on the equipment.